
Growing dill in your home garden makes a great idea as its leaves are highly versatile. You can use them to complete your salads, soups, dips, as well as other dishes.
Meanwhile, you can also take advantage of dill seeds as a spice. They enhance the taste of your roast and stew recipes.
Contents
Top Dill Varieties to Take Into Account

Scientifically known as Anethum graveolens, dill comes in a few different varieties. Further, you should be aware of it before planting any.
Your local nursery may simply offer them as ‘dill seeds’, but they can be Dukat or Bouquet varieties. Aside from these two, you can also find other variants, such as Long Island, Superdukat, and Fernleaf.
Dukat dill seeds typically generate leaves that are darker than other varieties. They offer excellent ingredients both dried and fresh.
If you are looking for a dill variety that is not only useful for the kitchen but also the decoration purposes, consider Bouquet.
Bouquet dill seeds can offer you a beautiful bunching. Likewise, it grows as compact plants of 30-36 inches (75-90 cm) tall.
Tips for Growing Dill in Your Home Garden

The period between April and May is the best time to plant dill seeds. It is because the dangers of frost typically have passed.
Then, you need to sow the dill seeds right in the ground. Also, let them germinate for around 10 days to two weeks.
You can plant the seedlings afterward in the depth of ¾ to 1 inch. Then, make sure to give space around 12 to 15 inches from one seedling to another.
Site selection and soil preparation

When growing dill you need to make sure that the site selection and soil preparation are well-executed too.
Find a full-sun location in your home garden and keep the dill away from powerful gusts of wind. Luckily, this feathery green plant can withstand temperatures down to -3.8 degrees Celsius.
Moreover, it is more recommended to grow dill in sandy, well-drained soil. However, this plant can cultivate perfectly fine in deprived conditions.
Loamy soil with a pH of 5.8 to 6.5 makes a great place for growing dill too. You just need to make sure that the temperature of the soil remains at around 21 degrees Celsius.
Fertilizing practice

If you want to fertilize your dill plants, do not apply it straight to their seeds. Instead, you should spread it around the sides or on the surface of the planting.
You can use fertilizing formulations that are already available at local garden centers.
For instance, 15-5-10 formulation does not contain too much phosphorus and 20-20-20 which is more commonly used.
To utilize the 15-5-10 formulation, you should apply 1 pound per 100-sq-ft area. Meanwhile, if you want to try the 20-20-20 one, use only 0.7 pounds for the same square feet.
Harvesting time

Of course, the best part of growing dill or any other herbs is the harvesting time. You can harvest this plant before it starts to bloom to get most flavors.
It is possible to harvest the dill as soon as it is big enough to use (when it has at least 4 to 5 leaves). Furthermore, this may take around 90 days after seeding to pick the plant that way.
You can clip the dill leaves to the stem in the late evening or early morning for harvesting. Once the blossoms form, they will bloom and seed accordingly.
In this case, it is necessary to cut the heads of the dill seed 14 to 21 days after bloom. Then, put the cuttings in a plastic or paper bag so that they can dry properly.
Once the dill seeds are ready, you will see them fall. Afterward, you can use them to grow another plant later.
If you want to suspend the plant from flowering, consider picking its leaves regularly. This can help the dill to generate a bunch of fresh foliage as well.
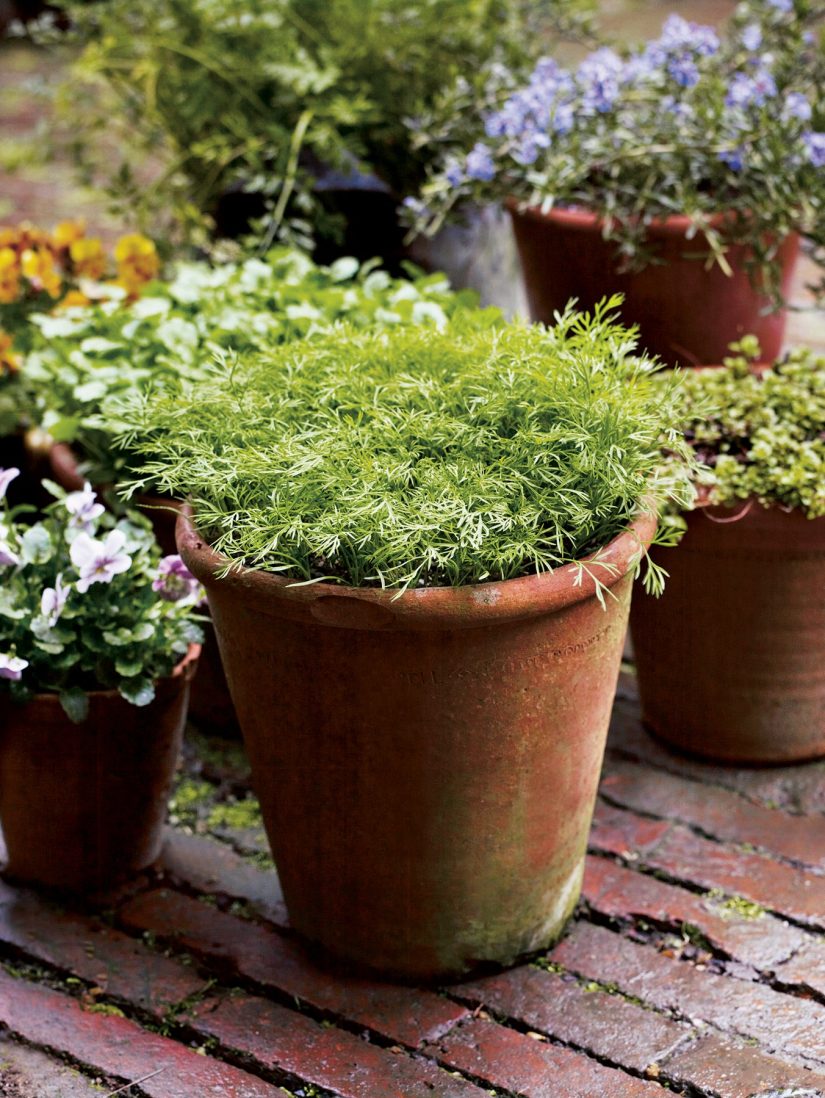
How to Grow Dill in Containers

Instead of your garden beds or borders, you can grow dill in pots. Just like many other herbs, this plant can cultivate well in containers too.
Growing dill in pots requires you to be careful in determining the depth of the container. It is because this plant grows a long taproot.
You need to use containers that are at least 30 cm (12 inches) deep. These pots provide sufficient space for the dill to grow.
However, it does not mean that the containers must be extremely deep.
Dill is an annual plant. So, providing additional space to develop a large system of roots over the years is not necessary.
Typically, containers with a depth of 30-61 cm (12-24 inches) are enough to let your dill grow happily.
Once you are sure that there are drainage holes underneath, you can simply sow dill seeds into the pot. Afterward, load it with potting mix.
Similar to growing dill in garden beds, the plant will prefer well-drained and a bit acidic soil. However, it can cultivate in most soil types.
Moreover, you should make sure to expose your potted dill plants to sunlight for about 6 to 8 hours each day.
Therefore, they can sprout perfectly.
In early spring, it is important to keep the potted dill plants inside the house beneath a grow light. Also, place them on a sunny windowsill.
Meanwhile, you can let the potted dill plants sit outdoors once all danger of frost has gone by. Do not forget to mist them frequently to keep the soil humid too.
General Tips to Care for Dill

You already know that the best conditions for growing dill include full sun and humid yet well-drained soil.
For this reason, it is somewhat vital to maintain the humidity level of the soil by watering it regularly. Do it particularly throughout a long period of dry summer.
However, you should not overwater your dill plants. Besides, do not let them sit in compost or highly wet soil since this may kill them.
You can also do the following tips to care for this herb.
- Consider utilizing twiggy sticks or bamboo canes to support the dill plants if you are living in windy areas.
- Use a general granular plant food to feed the dill. Then, apply it directly to the soil when planting or sowing.
- During summer, you can help the dill to generate more leaves by applying liquid feeds.
- Since dill is a biennial, expect it to die back to ground level during winter. When this occurs, you can cut back the blossom stems to tidy up the plants.
- Try to get rid of developing flower heads regularly to prolong the flavor and supply of your dill leaves.
When it comes to growing dill in winter, getting rid of dying and dead foliage is highly recommended.
Then, if the winter is not too severe and your soil is well-drained, the plants should come back for another year.
If not, you can simply sow some more dill seeds for the upcoming season.
Ideal Companion Plants for Dill
Companion planting is a highly useful gardening practice. It can create ideal growing conditions by attracting more pollinators and keeping pests away.
In terms of dill companion plants, there are some recommendations from experienced gardeners that you can follow.
Broccoli, corn, asparagus, and onion are among the suggested companion plants for dill.
Moreover, other options include cucumbers, lettuce, basil, Swiss chard, kohlrabi, Brussels sprouts, and kale.
On the other hand, growing dill near carrots is something you should avoid. It is because both of them come from the same family plant and can cross-pollinate straightforwardly.
Besides, you should avoid planting dill with potatoes, cilantro, peppers, eggplant, and lavender as well.
If you want to grow dill around tomatoes, make sure to prune it every week. Otherwise, this plant can stunt the growth of your tomato plants when they mature.
However, young dill plants are beneficial for tomatoes as they can attract pollinators and ward certain tomato enemies off.
Hence, you may like to keep both dill and tomatoes close to each other when they are young. After that, move the dill plant to another location before it blooms.
The Uses of Dill Plants

Dill is indeed a functional and eye-catching biennial or annual herb to grow both indoors and outdoors. It looks like fennel, but its taste is not as strong as its twin.
Its feathery foliage offers an attractive foil for other plants. Therefore, growing dill in the middle of your beds or big pots always makes a great idea.
You can expect the plants to generate sprays of yellow blossoms as well in summer. If you allow them to turn into seeds, they will make a nice ingredient for cooking too.
The leaves of dill plants are useful for flavoring rice and are ideal for fish dishes.
For example, some of them are gravlax and salmon. You can also chop them into salads and soups as additional toppings.
Of course, you can also make dill pickles by pickling the leaves with gherkins.
Finally, whether you are growing dill in pots or the garden beds, this plant can provide you with extra ingredients for your kitchen needs and a boost of beauty in your outdoor space.